
Which Via Should I Choose? A Guide to Vias in PCB Design
How much do you really know about vias, one of the building blocks of PCB design?
How much do you really know about vias, one of the building blocks of PCB design?
Vias are a staple of PCB design. But before you can decide whether to utilize buried, blind, or through vias, you should understand what they actually are and what they do for your board.
This article will act as a guide to basic via information.
Via Basics
What Is a Via?
Vias are used to electrically and thermally join traces, pads, and polygons on different layers of a PCB. Vias are copper cylinders that are placed or formed in holes that have been drilled in a PCB.
What Is a Via Pad?
Vias require a minimum amount of copper on a layer for a proper connection so, in most instances, a via pad (circle of copper called an annular ring) is attached to the end of narrow traces to increase the material available for a connection.
What Is an Antipad?
Surrounding the via pad is an area without copper known as the “antipad”, which insulates the pad from surrounding copper.

Two traces (left) that belong to the same net are on adjacent layers of a PCB. The traces are expanded in the area of connection with via pads and are joined with a via (right).
How Are Vias Made?
Unless you are at home with a DIY via rivet gun on a 2-layer board, vias are created during the PCB manufacture process.
Briefly, holes are drilled through copper pads on the PCB, a chemical is put in the hole to dissolve epoxy on the internal layers to further expose the interior layer copper pads. Finally, a bit of copper is put in the hole with electroplating.
For an animation of how boards are made (including vias), see this video:
Most PCB manufacturers will put sacrificial vias on their PCBs on a section of the production board. The vias are then sliced, and the cross-sections are examined to determine the effectiveness of the electroplating process.

A cross-section of a via. Image used courtesy of Data Respons
When Should I Use Vias?
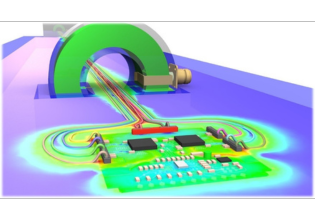
Vias provide a path for electrical and thermal energy to move from layer to layer on your board. Generally, the more energy being dissipated by an IC, the more vias it should have connecting its thermal pad to the underlying copper layers that can distribute the thermal energy.

A thermal pad for the QFN IC has 64 vias! Image used courtesy of Bittele Electronics Inc.
For parts of your circuit carrying power, or fast signals, use multiple vias to connect layer to layer. It is generally better to have several smaller vias than one large via. The design choice reduces inductance and provides additional paths for current in case one of the vias fails.
Types of Via
There are three basic kinds of vias:
- Blind vias: connect an exterior layer to an interior layer
- Buried vias: connect two interior layers
- Through vias: connect two exterior layers
.jpg)
A basic visual representation of a blind via, a buried via, and a through via. The orange here represents layers of PCB and the yellow bars represent the vias as they connect the layers differently. Image created by Mark Hughes.
For a simple two-layer board, your only option is a through via. For boards with more than two layers, you might also be able to specify blind or buried vias in your design (at increased cost).
It is often the case that a via needs to form an electrical connection between internal and external layers. The use of a through-hole via in such situations places an unused hole (and possibly an unused pad) onto other layers, and this consumes PCB real estate and interferes with routing on adjacent layers, but it is the cheapest and most reliable option. Blind vias can free up real estate by creating a connection between the two layers and a hole only on the layers in between. Buried vias are not often used due to expense, reliability concerns, and difficulty of troubleshooting.

A through-hole via for a 6-layer stack, with non-functional pads present (left) and removed (right)
What Kind Should I Use?
Through vias are generally the least expensive via type to include on your design. Blind and buried vias should be discussed with your manufacturer prior to board layout to determine their capabilities.
How Do I Use Blind and Buried Vias in My Design?
It’s important to remember that when PCBs are manufactured, each layer consists of two sheets of copper separated by a dielectric core.

Image shows a PCB stackup with through vias and assorted copper traces. Image used courtesy of RayMing Technology
These layers can be assembled in a variety of fashions during manufacture, allowing a combination of blind buried vias. Your computer software likely will allow you to specify which layers you would like to connect, but it most will not stop you from making choices that cannot be manufactured. If you cannot recreate your stackup with cardboard and a stapler, without bending or tearing the cardboard, your PCB manufacturer cannot make your board.
What Size Should Vias Be?
Check with your manufacturer for their minimum drill size and minimum annular ring for the manufacturing process they will use. Typical mechanical drills don’t go much lower than 12 mil in diameter without frequent breakage, so the manufacturer will increase the cost to account for broken drills. Annular rings don’t often go below 6 mil for standard processing. So the smallest via you would create has a 12-mil diameter hole, and a 24-mil diameter pad.
What other information about vias would you like to see added to this guide? Let us know in the comments below.


Thank you! This was a very interesting article. But, a question and a comment.
Q: Which is the primary purpose of vias, to distribute electrical energy or to distribute thermal energy?
C: The last sentence above the picture for “A through-hole via for a 6-layer stack…” eludes me. Namely “A blind via solves this problem, but blind vias high-speed due to expense, reliability concerns, and difficulty of troubleshooting.” seems to be structurally incomplete, and I cannot think what point it was attempting to make. Please help.
good